How to Organize Your New Website Content
March 5, 2021
)
I’ve been developing content for websites for as long as there have been websites! So I’ve learned a few tricks along the way to make this often-arduous and always-time-consuming process easier for all involved.
My process has developed over the years as I worked on website launches that were spectacular disasters in terms of process. Lack of a clear scope of work, disorganized development, review and approval of content, missed connections with the client or web developer and lack of documentation all contributed to various failures along the way.
What I hear from the web developers I work with is: “I wish all my clients organized their content this way.” Frankly, it keeps me organized too and gives me a means to share the site architecture and content with the client before it is sent to the developer.
By the way, these tips are helpful whether you are working on a client website with a developer, or working on your own website. You can never be too organized!
Learn from my mistakes and follow these 7 simple steps to organizing website content:
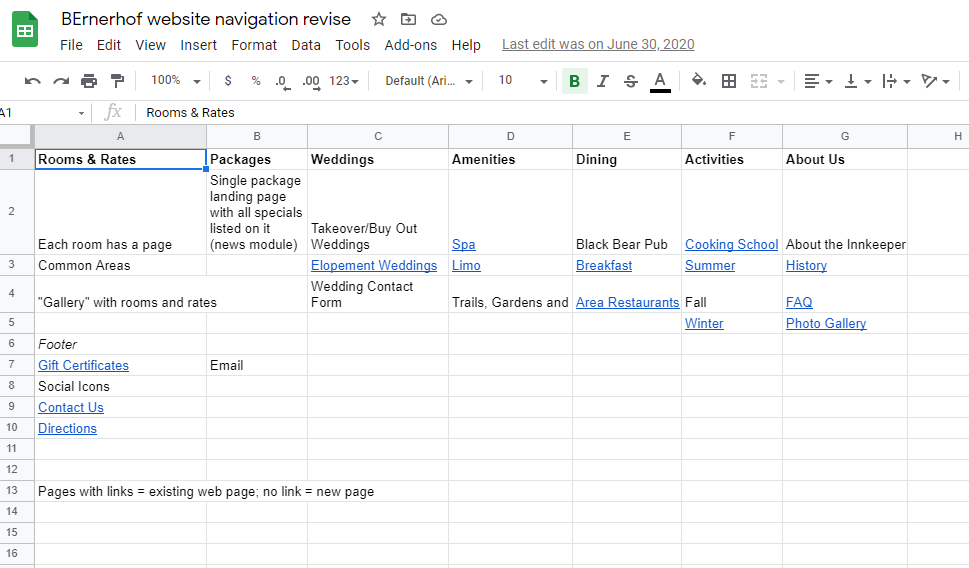
Step 1: Visualize the Architecture
I work with my client to define how we want to organize our content into pages. This informs the navigation of the site. My advice is to keep it simple and not suffer from “navigation sprawl.” Everything doesn’t need to have topline navigation. Think of navigation as “buckets” of information. Come up with top categories and drop in sub-pages beneath them. Sounds easy but many clients are over ambitious about having all content on the home page. It’s counter intuitive, but it’s harder to find information crammed into a disorganized home page vs. having it logically organized by category/navigation.
I set up a site map in Google Sheets and share with the client and the web developer. I use multiple tabs so that as the project moves along, I can add more information (more on that later in this post). Note that each page of content links to a Google Doc, so as I write content, I link the Doc to the Navigation Sheet. This also gives everyone a feel for the user experience of the site and how visitors might move from the home page into interior content pages. It also addresses content for the often-forgotten header and footer files.
Step 2: Rough Out the Wireframe
Everyone wants to get to what a site “looks” like in terms of graphics and color, but much like the navigation, it’s more important to define the structure and organization before you get into the design of the home page. Layout is too important to be left to the designer (sorry designer friends). Talk to your client about what’s most important to them. Organize the home page and interior pages in blocks so you can all agree on what information is placed where. Then hand that off to your designer and developer to start the design process.
I used Google Docs for this wireframe but you can also use Google Sheets, Canva, Publisher – whatever. Just keep it simple and focus on placement and priority of content.
Step 3: Write Your Content
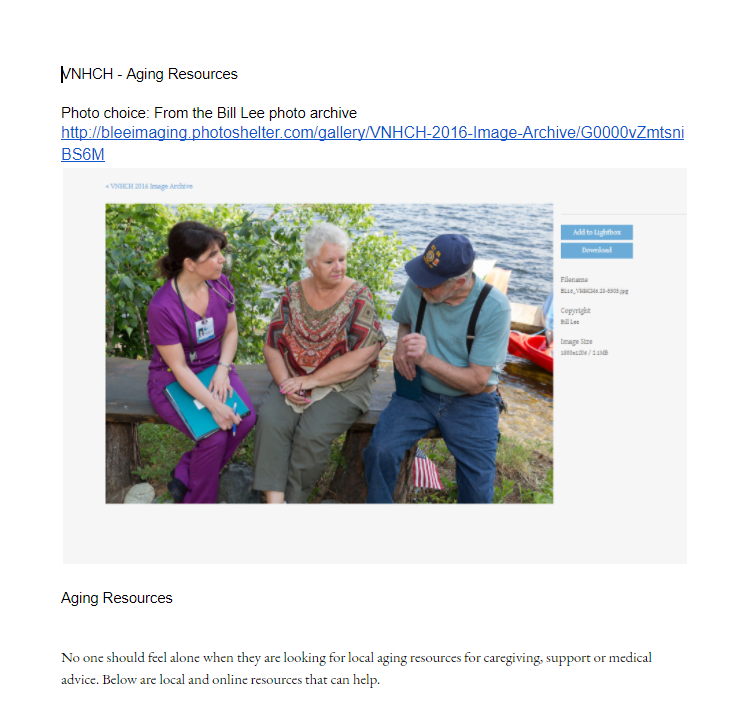
Remember that navigation sheet we just talked about? Here’s where we write the content that it links to. I create a Google Doc for each web page. Even if I’m basically scraping content for an existing site, I cut and paste it (use Notepad so you can strip out the coding bloat) into Google Doc. Even when you are bringing over existing content, it’s a good idea to review it for SEO opportunities, confirm its accuracy and audit for style, consistency and good writing. Then share the Navigation doc with your client and ask them to go through each linked Google Doc, providing comments and corrections right in the Doc. This will save you SO MUCH time compared to emailing back and forth with a client, getting feedback over Slack, phone calls, etc. You can even give limited access to certain stakeholder groups with view only or comment only access. It’s a game changer!
I title the Doc the same as the page header and drop in photos with a link to the high resolution photography file. The photography could be in Google Drive or in a photographer’s photo gallery. Either way, just ensure the client can see the image to understand what it looks like and your developer can get at the photo file in the format and resolution they need.
Step 4: Organize Your Photography
Speaking of photography, I always underestimate how much time it will take me to organize images for an entire site, even a small one. It’s so important and it’s so easy for it to get out of control. Try to avoid the email forwarding game. Or digging through your email box looking for that link to a photo gallery.
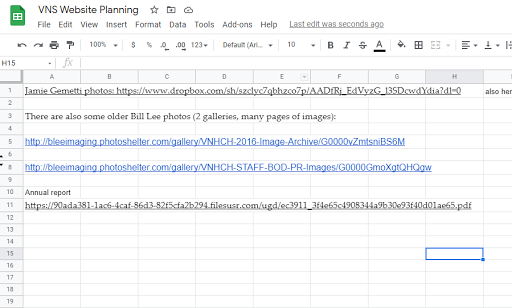
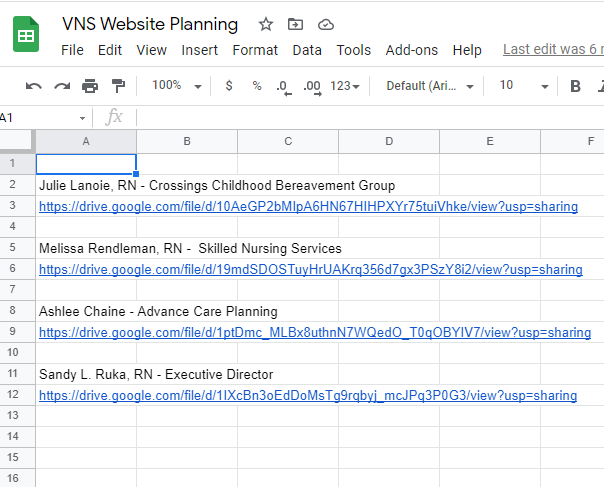
Remember I mentioned adding multiple tabs to your Google Sheet with the site navigation? This is where you can drop in links to all of your photo resources. In the example below, this was for a client I’ve worked with for years, so I had access to years of photography from multiple photographers. I list the link and the password (if any) so as I work on the site, I’m not having to dig around to find what I need. It also gives the developer what they need in case an image doesn’t have the right aspect ratio or resolution and they want to see what else is available.
A note for Canva users. I love Canva. I’m not a designer and don’t use higher end design tools like Photoshop. But the ability to resize images quickly and consistently makes Canva the perfect image editing tool. If your role in site development requires you to provide all images sized and ready to go, set up a template in Canva using the dimensions required and have at it. Then upload all the images into a Google Drive folder and link away.
This will save you so much time!
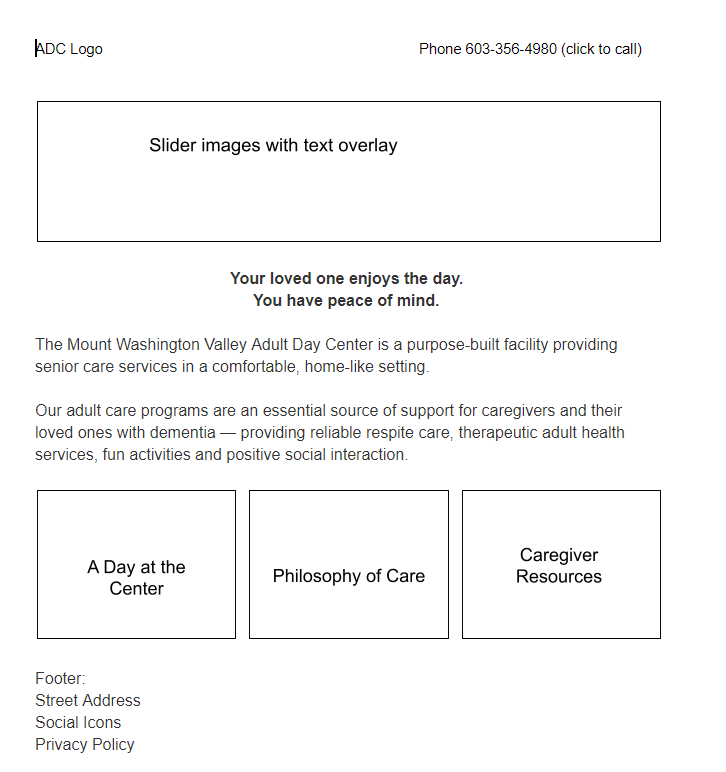
Step 5: Homepage Hero Images
If you are going to incorporate home page slider or hero images into your site design, use this method to document each image and related text in one place.
We all know clients are all about the home page and impactful home page photography. Make it easy for them to see your recommendations for photography. Put it in one place. Drop in whatever text will be associated with each image. Get the client’s review and approval of this before it gets to the developer. They’ll love you for it.
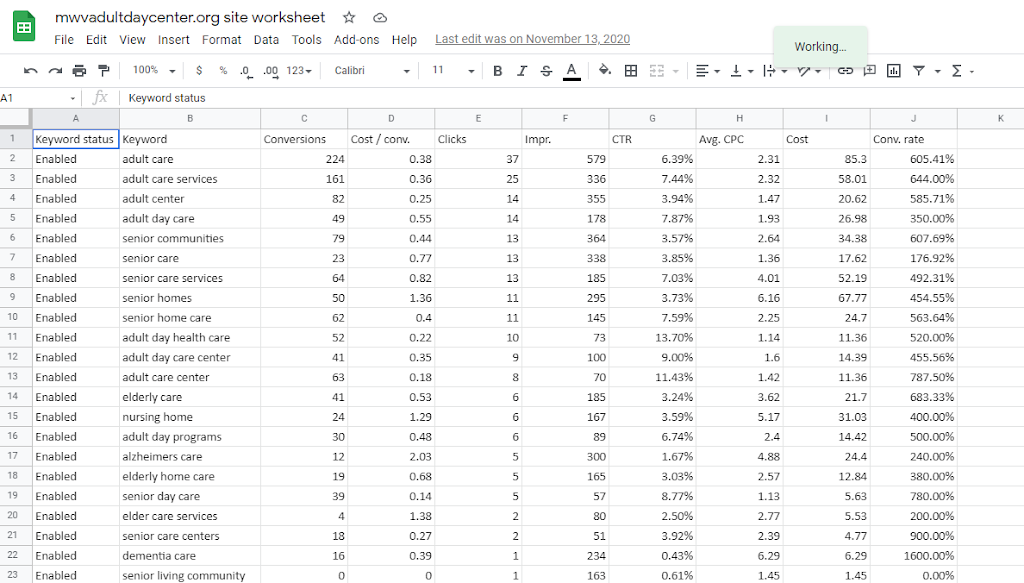
Step 6: Share Keyword Data and SEO Resources
When you are retooling an existing site, you can pull SEO and keyword data out of Google Analytics and share with your web development team. It’s also a useful resource for whoever is writing your content to be aware of those top keywords and ensure that the content written is keyword rich.
For new sites or for client sites that have not had Google Analytics installed previously (I recently ran into this – ugh), you can use tools like Yoast or Moz or any of the dozens of useful SEO apps out there to share keyword data with the project team.
Step 7: Hand Off Content to the Developer
Once all of this content is developed, reviewed and approved, you’re ready to hand it off to your web development team. They will cry tears of joy when you present it to them this way. I promise you, it will shave weeks or months off your schedule if you have the discipline to do this work ahead of time.
Housekeeping
While this doesn’t neatly fall under content development, the best site in the world can’t launch if you don’t have your housekeeping in order. Things like access to the domain registration can cause delays. I’ve had two instances in the last year where there were hiccups in accessing the domain. One was where an inn had changed hands and the domain registration hadn’t been handed over to the new owner. I was able to work with Network Solutions to regain control of it. but not until the inn’s email and website were down for 24 hours. Another recently was when an organization was previously managed by another non-profit who had renewed the domain for 10 years … 10 years ago. Getting at a Network Solutions log in and password after 10 years was tricky. Bottom line – front load these tasks so you are ready to tackle any roadblocks ahead of time and not the week you want to launch the site.
On a related note, I recommend touching base with the client’s IT team. You don’t know what you don’t know. They may not need to be involved in the site development, but sometimes you learn a thing or two. Get them on your side and understand any issues such as domain registration, firewalls, security requirements, etc.
Conclusion
Developing web content is hard work but it’s rewarding when it all comes together and the team has what they need to do a good job, and the client understands what’s going into their site. This cuts down on surprises later down the line, when it’s more time consuming (and expensive) to remedy misunderstandings.
Use these steps on your next website project and see how quickly you can get it done!